
Overview
이번 포스트에서는 기존 Android app 에 어떻게 Compose 를 적용할수 있는지 에 대해 다룰 것입니다.
Strategy
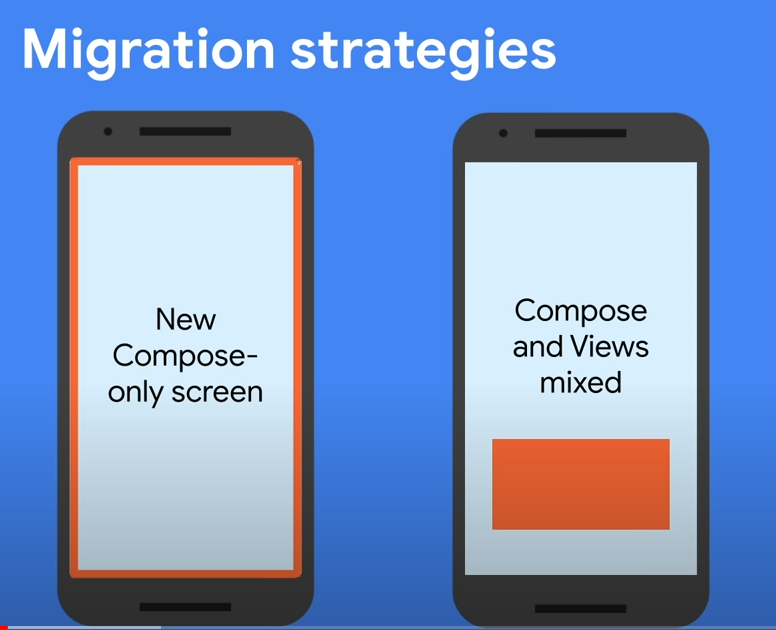
기존 Android app에서 Compose 를 적용한다고 했을 때 크게 두 가지 방법을 고려 할 수 있습니다.
- 전체 화면 즉 Activity를 Compose 로 구성
- 화면 일부분 즉 View 나 Fragment 를 Compose 로 구성
전체 화면을 Compose 로 구성
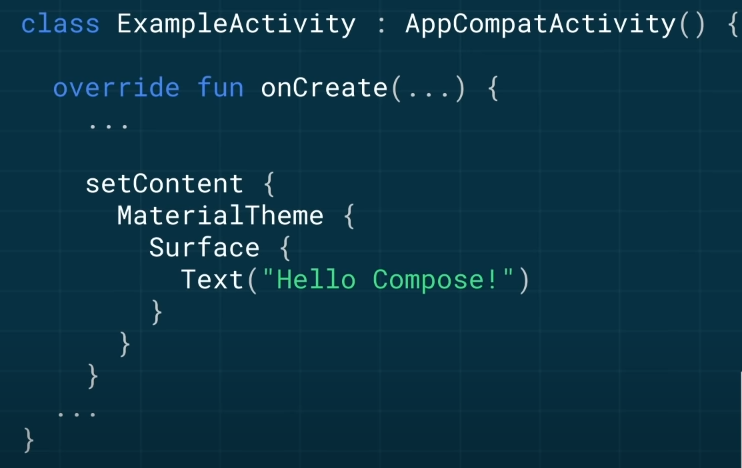
Activity 의 onCreate() 에서 setContents{ .. } 를 호출하여 Compose 로만 화면을 구성하며 기존의 Layout xml는 사용하지 않습니다.
화면 일부분만 Compose 로 구성
먼저 기존 Layout XML에 ComposeView 를 선언합니다.

Activity 나 Fragment에서 Layout를 inflate를 한 후 findViewById를 통해 ComposeView 를 불러오고 ComposeView 의 setContents{ .. } 를 호출하여 화면 일부분을 Compose 로 구성하게 됩니다.
기존 Android View 를 Composable 로 변환
기존에 사용하던 TextView, ImageView 또는 Layout view를 Composable로 변환할수 있습니다.
이때 사용하는 것이 AndroidView 입니다.
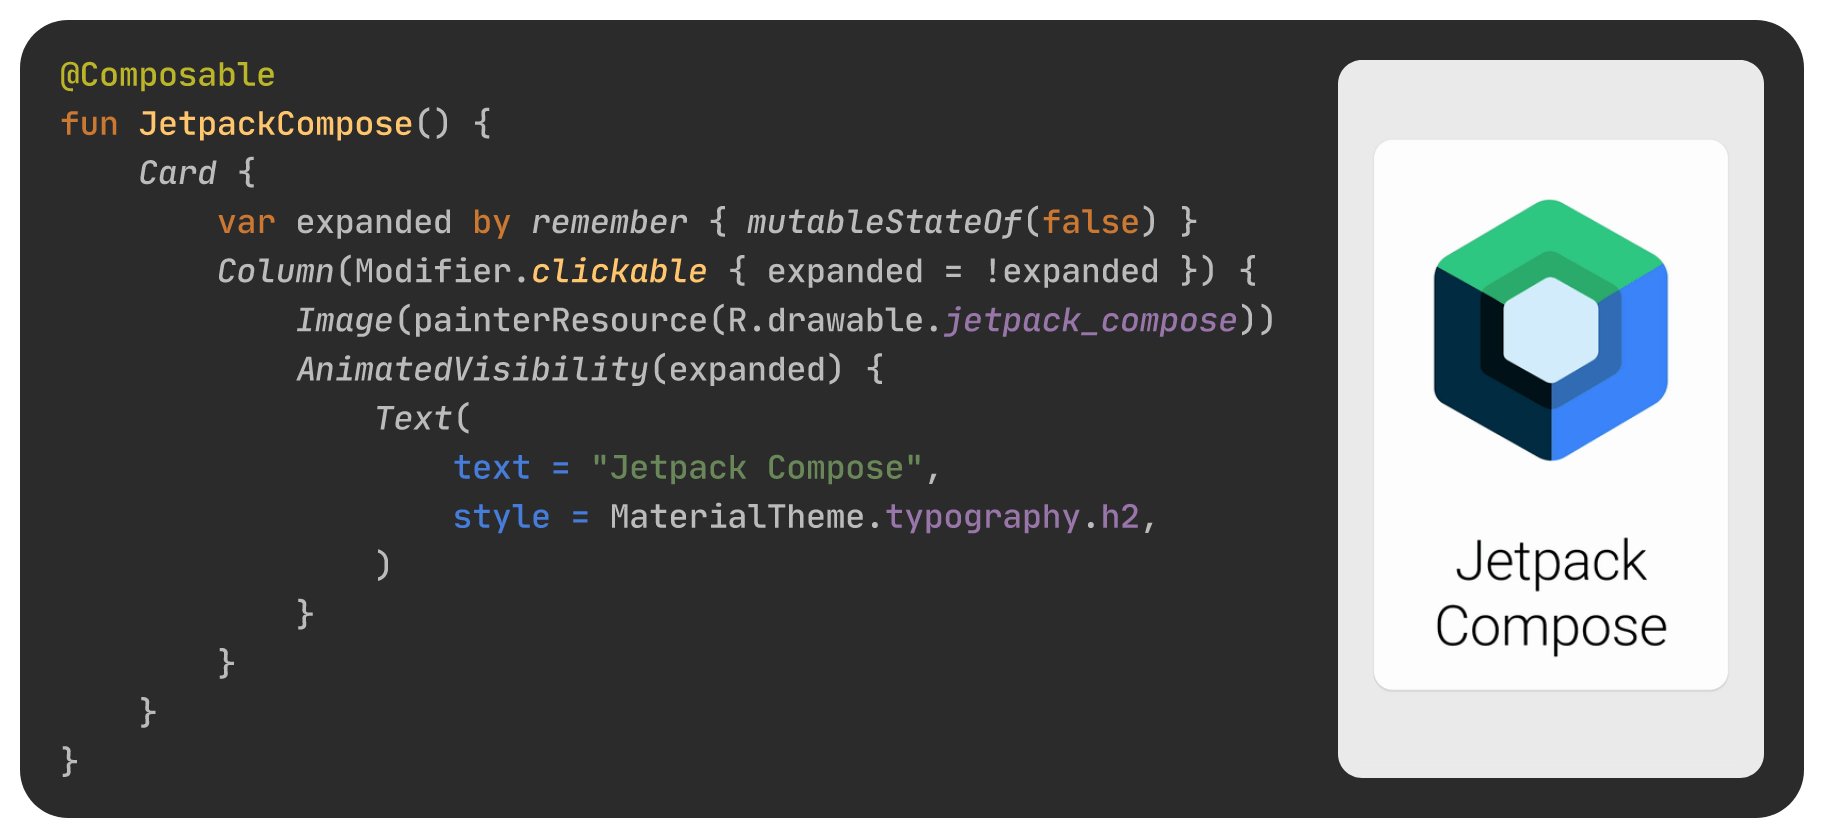
@Composable
fun TestAndroidView() {
    AndroidView(
        factory = { context ->
            LinearLayout(context).apply {
                orientation = LinearLayout.VERTICAL
                repeat(5) {
                    addView(TextView(context))

                }
            }
        },
        update = { layout ->
            layout.forEachIndexed { index, view ->
                (view as TextView).text ="Hello world #$index"
            }
        }
    )
}
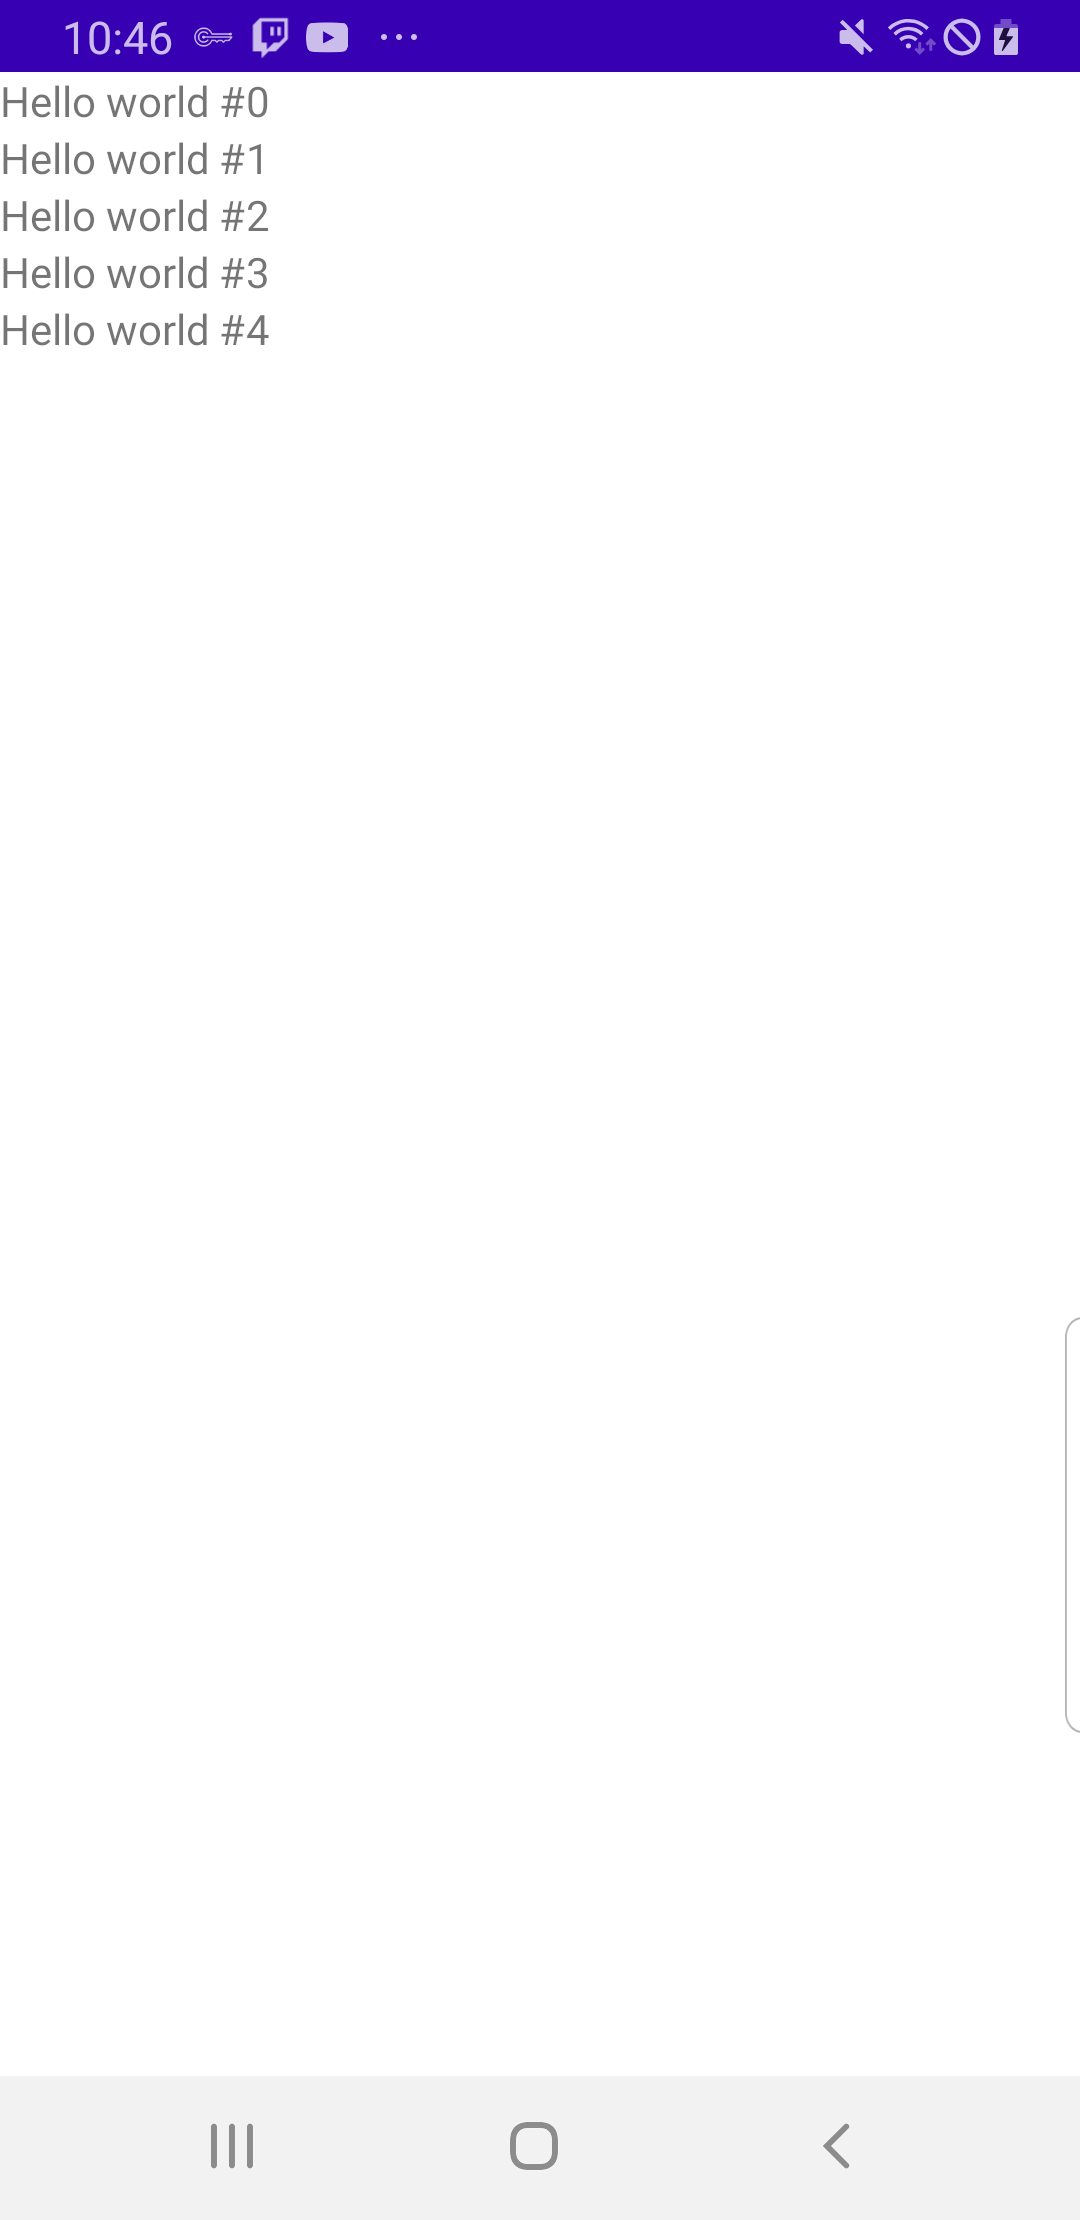
AndroidView 에 factory 매개변수는 실제 View 를 생성하는 람다식을 넣고 update 매개변수는 상태가 변경했을 때 View를 업데이트하기 위한 코드를 람다식으로 전달합니다.
위 코드에 대해 간략히 설명하자면 수직 방향의 Linear Layout를 생성하고 그 안에 5개의 TextView 을 생성합니다.
위 코드를 실행했을 때 아래의 화면이 보여지게 됩니다.
댓글남기기